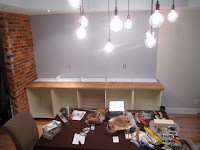
we needed a contractor to create a custom built-in cabinet who would:
- work long days [and into the night]
- for a discount price [maybe even free]
- to get the project done in 6 days [did i mention it was custom?]

so we flew Jenny's Dad in from LA for a week.
John is a self-taught carpenter/electrician/plumber who was more than game to lend a hand in building the cabinetry. We agreed upfront that its a "team" thing and we're all going to put in work to make it. and we all did. but SOMEHOW he ended up doing most of it ;-)
we saw these built-in cabinets at a friends' house recently and decided to cop their style. its simple & bold and practical....we just needed to know how to make it.
so we sent John a picture. and a diagram of what we wanted. he diagnosed it and sent over an extensive home depot shopping list: Large sheets of Poplar wood. Long pieces of galvanized steel pipe. biscuits {what the hell are those?} dowels. and glue. LOTS of glue.
we saved some time in the process by buying the lower cabinets from IKEA. we liked the stainless steel door fronts and the fact that they didnt have to be built from scratch [though sometimes it feels that way with IKEA shit] we also got the countertop from IKEA, though it came in two separate pieces that had to be cut & joined together [break out the biscuits!]
once the cabinets were anchored to the wall and the top was set, we began to build the open wood shelving that was to sit above it.
on its face: pretty easy, right? measure some shit. cut some shit. glue some shit. paint some shit. done.
ummm....yeah. notsomuch.
first of all, when you really examine a house, any house, you will see things that are not what you thought they were. as in: its hard to build a cabinet flush to the wall when the wall isnt straight to begin with. not to alarm you, but thats just the way it is just about everywhere. and its only off by fractions of an inch. but over a 10+ foot section of wood, that makes a big difference.
the shelving was to be built in two pieces: the interior/cubbyholes were first. the "face" frame was second.
i'll skip the boring details on all the measuring, cutting, re-measuring and re-cutting we did, but somehow, miraculously, we were able to chop down all the large pieces of Poplar into sections that were glued together one at a time.
[How John was able to run all that wood through the table saw without chopping his fingers off, I'll never know.]

all the sections were held together by large metal clamps that John sent our way the week before [they were the key to the process....and the biscuits, too]
once the backside was built, we began the same process with the "face" frame and then fit it all together
then, all of a sudden, we were in a good place. we painted all the shelving with a few good coats of semi-gloss white and let it dry for the night. so we decided to let our hair down for the night and head out for a much needed break before the final stage of the work. it just so happened to be halloween, and as you can see, we had a good time.
the last stage was to fit the face frame on the cubbyholes. we rented a nail gun from home depot for the occasion. we actually rented alot of stuff from home depot. some which were real rentals, and some items that we returned after we realized that we didnt need to keep them forever {"SHHHHHH"}

after some spackle and touch-up paint, it was done!
5.5 days. 200+ man-hours. 1 case of beer. and 48 biscuits later.....we had ourselves a built-in. and a damn good-looking one too.
after John caught his 1st class SouthWest Airlines seat back to LA, Jenny and I finished up adding the cabinet doors, molding, and wine racks to finish the installation. the wine refrigerator arrived a couple days later and that officially completed the project.
now all we need to do is stock the bar. No help needed on that front...I think we can take things from here....but a HUGE thanks to John for making this happen. We owe you a cold one [and maybe a little bit more]


1 comments:
Nice ideas its Really very lovely i like it nice post..
Thank you for post.Speedfit Push Fittings
Post a Comment